Tuesday, December 2, 2014

Seafood Stew with Zucchini

This is actually one of my mother's recipes that I have appropriated for this blog. Fair Warning: if you don't like ginger or cilantro, you aren't going to like this recipe. I find it a great recipe for winter colds because the ginger really sears into your sinuses and the chili powder adds a kick.


Most of the ingredients used in this are straightforward Indian spices which do not require a trip to your local Indian grocery store. However, there is one ingredient that might give you a bit of trouble, "Panch Poran" which literally translates into "5 Seasonings". Unsurprisingly, it consists of 5 different whole seeds: fenugreek, nigella, black mustard, fennel and cumin.


It's sold in most Indian grocery stores and is a cornerstone of Bengali cooking. If you can't get it, no worries. Just substitute some 1 tsp each of cumin and coriander powder.

Ingredients
1 1/2 pounds of white fleshed fish. I personally like Basa (see my Chili Fish post for more info about it)
1/2 tsp turmeric
1 tsp chili powder
1/2 tsp salt
Cooking Spray
2 medium sized zucchini, skin on, halved lengthwise and then cut into 2 inch pieces in cross section
1 tsp panch poran
1 3inch piece of ginger, peeled and grated (I use double this amount, but I really like ginger)
1 small yellow onion, finely chopped
2 plum tomatoes, finely chopped
1/2 cup water
1/2 bunch of cilantro, leaves only


Ginger and Onion


Ginger about the size of my hand, 5-6 inches
Ginger peeled and grated, will definitely be less than what you started with

1. First coat the shrimp and fish in turmeric, chili powder and salt and let sit for 10-15 min
2. Coat a pan with cooking spray and heat over medium heat
3. Fry the shrimp until they just start to turn orange, about 20 secs on each side. 
4. Recoat the pan with cooking spray
5. Fry the fish, until the flesh starts to firm up and gets a little crisp, about 45 secs on each side.
6. Drain both the shrimp and fish on a paper towel and set aside


7. In the same pain, heat 2 tbsp of oil over med high heat
8. Add in the panch poran and stir fry for about 20 secs or until fragrant
9. Add in the onion, ginger, tomato and stir fry until the panch poran is well distributed in the mixture
10. Fry for about 5 min, adding more oil, 1 tsp at a time, if the mixture starts to stick to the pan
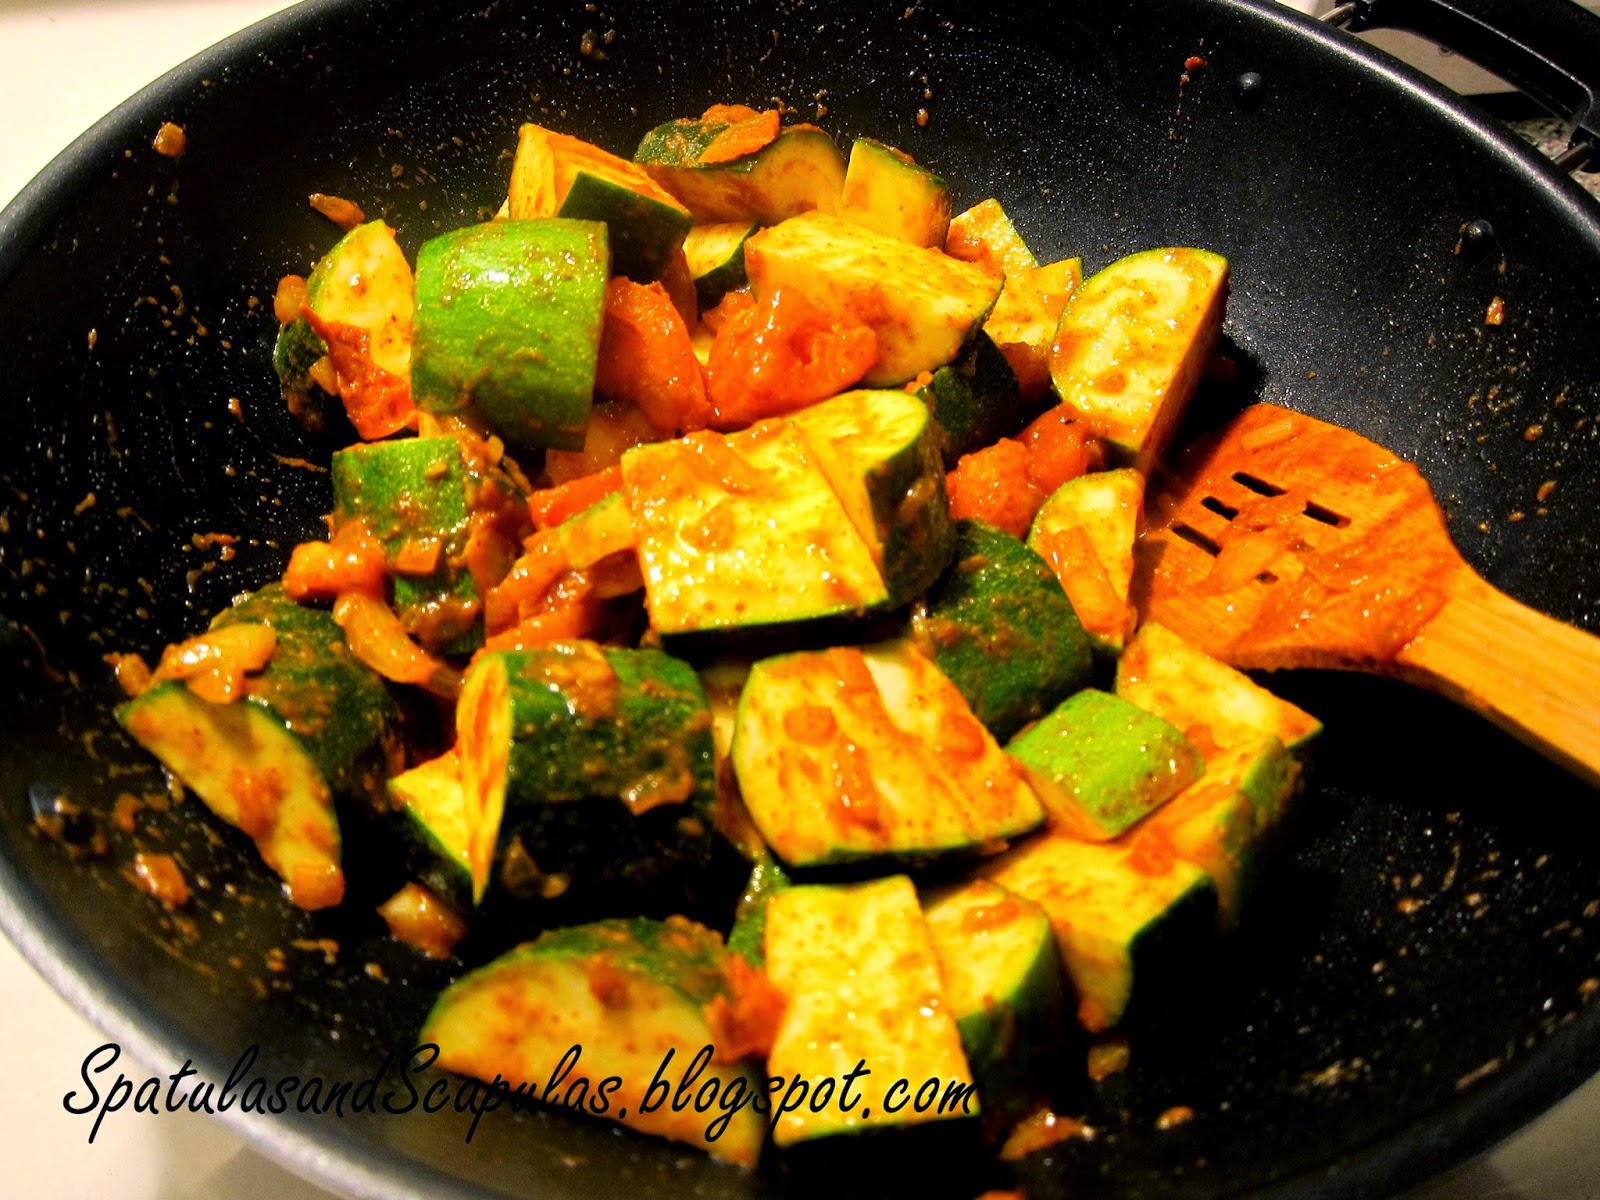
11. When the onion and tomatoes form a paste, add in the zucchini and stir until the zucchini is well coated with the onion/tomato mixture


12. Turn the heat to low and cover the pot. The zucchini should start to release water. After about 10-12 min, add the 1/2 cup of water and bring to a simmer.
14. Simmer for 20-30 more min or until the zucchini is 3/4 cooked through.
15. Add the fish in and cook until the fish is cooked through
16. Add in the shrimp and cook for 5 more min. Season with salt to taste.
17. Turn off the heat and add in the cilantro on top


I didn't precook the fish in this recipe just to see how it would be. I prefer it gently fried before hand


If you let the cilantro just sit in the hot broth, it should wilt sufficiently and lend its flavor to the broth. The timing of when to add the fish and shrimp is the hardest part so that you don't over cook either, so be extra cautious during this period. You can also add fresh ginger at the end to give it a bigger kick. 

Spoon over hot rice and enjoy!

Friday, October 31, 2014

The Great Limoncello Endeavor

Ah, Limoncello. Ever since that first sip on a terrazzo in Sorrento, Italy, I have been trying to find something at the same standard as that delightful concoction in the states. That has proven to be rather difficult as my benchmark came, not only from the country that invented limoncello, but the region that perfected it. Even "imported" limoncello just did not hold a candle to anything that we tried in Italy. So, I had two options open to me if I ever wanted to taste that elixir of the gods again: go back to Sorrento or make my own. While I would jump at any opportunity to return to the land of Michaelangelo and gelato, medical school had put a roadblock to travel plans. So I turned to internet to help me out. To my surprise, there were multiple ways to make limoncello that each person swore by. Vodka vs Grain alcohol. Direct immersion vs suspension. Zest vs Peel. So many choices. Here are a few of the many links I perused in my search. SuspensionZest ImmersionPeel Immersion. I tried out a few ways, but there were too many variables to compare and keep track of. At the end of the day, there was really only one way to find out which recipe was truly the best: AN EXPERIMENT. I channeled my inner Bill Nye and came up with the following scenarios.


Basically, there were six scenarios, four with vodka and two with Everclear. I was a little skittish about using Everclear for the first time, so I decided to just try two conditions with it for the first go around. I used 200ml of vodka and 100ml of Everclear for each condition. For the lemons I used Meyer lemons, since they are supposed to be a little more sweet. Even though some of the recipes call for organic lemons, I just used the regular store bought kind. I was just careful to wash and scrub all the lemons thoroughly under hot water. For my containers, I used wide-mouth one quart mason jars.

The Prep

Whole Lemon Immersion: This was the easiest. Just plop that sucker in the jar and close the lid. 

Lemon Peel Immersion: This was the most time consuming. I used a regular vegetable peeler to get the peel off the lemon. It had a significant amount of white pith still stuck to it, so I had to use a serrated paring knife to get the peel off. Significant amounts of pith can lead to a bitter taste to the limoncello, so I tried to get as much off as possible. However, you don't have to go crazy. A little bit of pith is acceptable and okay. I found the Wusthof serrated paring knife worked wonders in getting the pith off. 

Pre and Post Depithing

Lemon Zest Immersion: This method also took a little effort, but not as much as the peel. I found a microplane to be an essential tool for this job. It allowed me the best control over how deep I went and made very fine pieces of zest so that there was a lot of surface area to interact with the alcohol. After I collected all the zest, I just swirled the microplane in the alcohol a couple times and that was that.


The lemon doesn't have to completely white after zesting

Whole Lemon Suspension: This required the most materials, but was surprisingly quick. The concept behind this method is that, as alcohol vaporizes at room temperature, it rises, macerates the lemon peel and extracts the oils and then condenses on the side of the jar. And repeat. I got some restaurant grade butcher's twine and cheesecloth just to keep things safe. To prep, wrap the lemon in the cheesecloth and tie it off with the twine. Make sure to cut off all excess cheesecloth above the knot. Then suspend the lemon over the alcohol, but as close as possible and secure the twine in place by screwing the mason jar lid over it. I found that if I hung my lemons too high, the oils would condense on the twine, travel up and leak out. I don't why hanging the lemon lower prevents this. My guess is that the oil dense vapor can only rise so much before condensing, so the lower height gives it more chance to condense. However, this is pure conjecture and I will have to do more research into the subject. Hang your lemons low. Just trust me.


The Run Down


Whole Lemon Immersion:Vodka

Peel Immersion: Vodka

Zest Immersion: Vodka

Whole Lemon Suspension: Vodka

Zest Immersion: Everclear

Whole Lemon Suspension: Everclear

I used one lemon in each test condition because I wanted to keep things equal. So even though the recipes you see call more a greater ratio of lemon to alcohol, I want to see what method does the best job of extracting lemon flavor. So there is only zest from one lemon in each jar, and peel from one lemon. Once I figure out the best method, I'll go forward from there to optimize the flavor profile.


After all the jars are sealed, I like to leave them in a cool dark place for about 4 weeks. The end point should be a translucent yellow. If it starts looking brown, you know you've gone too far. I'll be posting picture updates every 2 weeks just to show how the limoncello are progressing and, of course, a post at the end of the month with the results of our blind taste test!


Notes: 
So, I didn't quite get to doing the two week updates, but the ones with the best flavors were both the suspended ones and the zest submersion with vodka. The others had a slightly bitter taste that came, I assume, from the pith that I was not able to remove. Also, the everclear sucked the lemon flavor out nicely, but it was just too strong even with the simple syrup at the end.  

Tuesday, October 28, 2014

Shrimp Tacos

Most of the times when I cook, I throw random things into a pot and hope for the best and, most of the times, it turns out okay. Sometimes, its a disaster and I try to make someone else eat it. Then there are those rare times, a miracle happens and all things come together for an amazing bite and I know I have something special. It happened once before with Cilantro Chicken and now, thankfully, I got lucky a second time. 

This recipe is actually a collection of four recipes that come together in the tacos. I also added my recipes for tortilla chips, cause lets face it, you need something for all that guacamole.


Guacamole
3 Haas Avocados, pitted and peeled
1 Lime, juiced
5-6 sprigs of cilantro, washed and leaves plucked
1 small red onion, coarsely chopped
5 cloves of garlic
2 tsp cumin powder, freshly ground is better
Salt to taste


1. Put all the ingredients into a food processor and blend. Now, normally, I am all about the chunky, hand mixed guacamole, but for this particular recipe, I like the creaminess of the food processor version. It's a good juxtaposition to the salsa. 


Tomatillo Salsa
5 tomatillos, chopped
2 plum tomatoes, pulp removed and chopped
1 jalapeno, seeded and chopped
5 sprigs of cilantro
Salt to taste


2. Combine all the ingredients together into a salsa. Add salt to taste. I really love the texture and flavor of the tomatillos in this recipe. They are readily available in most bodegas and even some mainstream grocery stores. They taste like a cross between a granny smith apple and a tomato. There's a crispness to them that I love. 

Shrimp
2 pounds of shrimp, 26-30 count
2 tablespoons of garam masala
Cooking spray

I actually prefer the smaller sized shrimp as you get a good mouthful with each bite. As for the garam masala, this is the one of the few times I would HIGHLY recommended a particular brand. There's just something about this MTR garam masala that goes phenomenally with this taco. 


3. Coat the shrimp with the garam masala and leave for 10 min. Can be done quicker if you are in a hurry. 


4. Heat a skillet over medium high heat. I like to use cooking spray for a light even coat of oil. Fry shrimp evenly on both sides (about a minute on each side) or until there is a light char on both sides. 

Tortillas
I personally prefer corn tortillas for this recipe and you can get them for very cheap at most bodegas and for a decent price and supermarkets. For the tacos, I like toast the tortillas in an skillet before serving so they are warm and a little crispy. 


Chips
Tortillas, cut into sixths
Cooking spray
Salt

1. Preheat oven to 400, 
2. Spray some parchment paper down with cooking spray
3. Arrange the tortillas on the greased baking sheet
4. Spray the tops of the tortillas with the cooking spray
5. Sprinkle salt on top
6. Bake for about 10-15 min or until crispy.  


Assemble your ingredients and enjoy!


Photo Credit: Paul Sirajuddin


Sunday, August 17, 2014

Corn with Feta Cheese Spread

On the streets of Mexico, if you dare to try it, is corn with a cheese spread, called Elotes, the likes of which you have never tasted before. It's delicious, tangy and, unfortunately for you, not what this recipe is about. The Mexican corn cheese spread is a mixture of cotija cheese, cayenne, mayonnaise and cilantro. If  you want that recipe you can go here, Elotes. However, my variation relies on somewhat less exotic ingredients. Although, don't get me wrong. Cotija cheese is amazing and if you can find it, go with that.

1/2 cup feta cheese, crumbled
2 hard boiled egg yolks
1.5 tablespoons of toasted* paprika
1-2 tablespoons of lime juice
1 tsp of parsley
Mayonaisse to taste
salt to taste

4 ears of corn

*just warm up the paprika powder on a dry skillet to released some of the oils. 

The amounts for this recipe actually matter, but again, everything is to your taste. You don't like tang so much? Less lime juice for you.  

1. Combine all the ingredients, except the corn, into a smooth paste. It's ok if there are little bits of feta. Slather on your corn and devour!


Wednesday, August 13, 2014

Broccoli and Cheese Stuffed Zucchini

Did you ever notice how the minute a food is "stuffed" with any other food, it immediately sounds more impressive. Sausage Stuffed Mushrooms. Rice Stuffed Peppers. The most impressive I've heard is crab stuffed shrimp. Mm Mm Mm. But, at the base of it all, does stuffing something reeeally make that much of a difference? Couldn't you just have sausage and mushrooms on the side and just eat them in the same bite? Well ya, you could, but that would not nearly be as much to make OR eat. Plus, there is a certain amount of flavor infusion that happens that makes all the effort worth it. 

I got inspired to make stuffed zucchini as a means to get rid of some extra ingredients in my fridge. But it turned out pretty well, so I think I may just make it again. The trick is to pre-cooked the zucchini a little bit. Not only does it cook faster without all the stuffing, but it also makes scooping the flesh out so much easier. 

Warning: I know most of my recipes are more or less approximations of amounts, but this recipe especially is more of an overview than a detailed how-to. Mix ingredients (and amounts) at your preference!

2 Large "fat" zucchini
1 cup of shredded cheese (I used Vermont white Cheddar)
1 head of broccoli, shaved down to florets
3 tablespoons of hot sopressata, minced (optional, but I like the tang)
2 tablespoons of Panko Bread Crumbs
Salt to taste

1. Preheat oven to 400F
2. Cut the zucchini into two inch long sections, across the grain
3. Drizzle with olive oil and salt
4. Arrange on aluminum lined, greased tray and bake for 15 min or until a fork goes into the zucchini easily. Keep the oven on.


5. While the zucchini is baking, shred the cheese and mix with the sopressata


6. Mix with the broccoli florets. Note: I generally don't add salt to the mixture, because the cheese and the sopressata have enough salt as it is. 


7. Once the zucchini has cooled, scoop out most of the inside flesh, leaving about a 1/2 centimeter thick shell. Eat, don't discard, the flesh. Let's not waste food people. 


8. Stuff each zucchini with the cheese and broccoli. Top with some of the panko bread crumbs. 


9. Bake for about 15 more minutes or until the top is golden brown like below. 


Enjoy, but be careful! The cheese is hot!

Monday, June 9, 2014

Spicy Catfish Casserole

This recipe embodies the phrase, Don't Judge a Book by its Cover. I'll be the first to admit that it looks messy as hell. Even the title of casserole, which is more lenient in terms of looks, doesn't quite make up for the fact that it just kind of looks like, glop. However, it's delicious and its precisely this homogenous look that brings together a rather interesting assortment of flavors into one cohesive whole. I created this recipe in the Bengali style of "chorchori" which, as far as I can tell, means mash. Basically, all the ingredients are cooked well and long to the point where they are melting and then stirred together to mix. Often this recipe is cooked with tiny whole fish, which are first deep fried and, thus, retain their structural integrity in the mash. Eggplant is a staple, while potatoes may or may not be added. Give it a chance!

2 lbs Catfish nuggets
1 pod of Garlic, minced, or to taste
1 medium red onion, chopped
3 jalapenos, 1/4 inch round slices
1 8oz package sliced mushrooms
1 medium purple eggplant, sliced and then cut into sixths
1 tbsp vegetable oil
1 tsp turmeric
2 tsps ground coriander
2 tsps ground cumin
1 tsp red chili powder
Salt to taste

1. Prep the ingredients. Mix the turmeric, coriander, cumin, chili powder and salt together. Save half the spice mixture. Coat the catfish well with the other half. I generally just use my hand for this step, but if you have sensitive skin, beware the pepper. Also, I really like garlic, so I use an entire pod. Of course, that is not necessary. I have to say though, even with a pod, its not overly garlicky to my taste. 


1. Add the vegetable oil to the pain over medium high heat. Once, it starts shimmering, add the onions in and fry till translucent. 

2. Add the garlic in and stir fry for about 3 secs or as it starts to brown, but not burn. 

3. Add the the rest of the spice mixture and stir fry for 30 more seconds until the spices are aromatic. 

4. Add in the fish and coat well. Fry for about 5-7 mins until the fish have taking on a more solid shape. The fish will release some water and turn the onion, garlic and spices in a paste. You don't want to cook it till the water has dried up because you want to use to paste to coat the veggies. 


5. Add in the vegetable and stir fry until well coated with the onion and spice mixture. 


6. Lower the heat to simmer, cover and cook for 20-30 min, stirring occasionally to make sure the bottom is not sticking too much. It's ok if it stick a little as long as it does not burn. The veggies and fish are going to release a lot of water. That's ok, just let it cook. 

7. Cook on low heat until the fish and vegetables are cooked through. At that point, take off the cover, turn the heat to high and start reducing down the water. DO NOT add salt until the end. As the water evaporates, the dish will get more salty.  This is the step where things can burn easily, so I would stir relatively often. Stir gently, taking care not break apart the fish too much. Some breakage is inevitable and will lend flavor to the fish, but the trick is to keep the fish intact as possible and form the vegetables into more of a mixture. Once you think you have about a tbsp of water left, turn off the stove and let it sit. 

8. Plate over hot rice and enjoy!


Wednesday, April 30, 2014

More food art!

My friend forwarded this to me and I thought it was perfect for this blog. I especially like Vietnam's flag! It's been a good year for lychees!

vietnam-flag-made-from-food

http://www.visualnews.com/2013/08/27/national-flags-created-foods-country-commonly-associated/

Sunday, April 13, 2014

Tandoori Chicken Saute with Mushrooms

I have previously heralded the advantages of spice mixes, but this post will center around spice pastes. Cooking with spice pastes is, is possible, even easier than mixes because often, all you need is a protein and the paste itself and you're good to go. This particular recipe is a little bit more involved than mixing two ingredients together, but worth it! More people are probably familiar with Tandoori Chicken, the bright red roast chicken ubiquitous at all Indian buffets. While its true that tandoori is generally a roast, named after the oven its cooked in, I find that the tangy spice blend also works very well in curries.  


A traditional tandoor oven


2 pounds of boneless chicken, cut into 1-2 inch cubes

2 tbsp of Ghee (or butter or oil)
10 oz of baby bella mushrooms, cut in halves. 
1 medium white onion, cut into strips
2 tbsp yogurt
4 tbsp Tandoori paste
Juice from 1/4 of a lime
Salt and pepper to taste


1. Marinate the chicken in a mixture of the tandoori paste, yogurt and lime juice. Minimum 1 hour, but the longer the better. 


2. Prep the mushrooms and onions while you wait


3. Warm up half the ghee up in a pan on medium to low heat. Add the onions. Fry till the onions are translucent and soft. A little browned but not burnt. You should still be able to easily separate the strands. Remove from heat and put aside.


4. Add the rest of the ghee to the pan. You can reuse the same pan as long as there are no burnt bits left over. Once the ghee is hot, add the chicken and mushrooms and stir fry quickly. 


5. After the initial sear, the meat may start to water a little bit. At this point, turn the heat to low, and cover. Cook for about 20 min or until the chicken is just cooked through, but still soft. 


6. Take off the cover, turn the heat to high and reduce the water until the sauce is clinging to the mushrooms and chicken. There should only be about a tablespoon of excess sauce. At this point, add the onions back in. Stir for a few minutes and then remove from heat. Both the meat and the onions can be a little browned at this point.


7. I like to plate the onions first and then pile the chicken and mushrooms around them 


This is best eaten with naan, chapatis or other breads. It works with rice, but there just isn't enough gravy to coat the rice properly.

Enjoy!

Thursday, April 3, 2014

Pork Stew


So, I normally do not cook pork. Given the large Muslim population where we grew up in India, pig was rarity and somehow, that aversion spilled over to the Hindu population as well. As kids in the states, we ate pork only in restaurants and even then, mostly as toppings on pizza. However, as I sprouted my wings and left the nest, I ventured into trying out "the other white meat". 

This particular recipe came about during Pork Month at Hmart. For weeks, I would walk by and see people buying pounds and pounds of pork from the butcher, so finally I gave in to indirect peer pressure and got some pork picnic. What exactly is pork picnic you ask? I have no idea! At last, not until I turned to google. Turns out, Pork Butt and Pork Picnic are upper and lower parts of a pork's shoulder, respectively. Picnic has more bone and is sold with skin on where as Butt has a small bone and a smaller fat cap. Granted, I did not buy the entire Picnic, but mine still came with a sufficient large piece of skin. I got home and really had no idea where to begin, so I thought, stew! Can't go wrong with stew, especially when its spicy and this is how it went....

Ingredients
2lbs Pork, preferably with some fat and skin
2 large onions, halved and then quartered
1 pod of garlic, about 10-12 cloves, coarsely chopped
3 dried red chili pepper
2 tablespoon Sesame oil, adjust as necessary
1 tablespoon soy sauce
1 tablespoon lemon juice
1 quart chicken broth
Salt and Pepper to taste


1. Rub the pork down with 1 tbsp of sesame oil and some salt and pepper. I would a half teaspoon of each.
2. Heat a heavy bottom pan or a dutch oven until its very very hot on high heat. 
3. Quickly sear the pork evenly on both sides, 30 seconds should be enough. I like a little thicker sear so I let it got for a little longer on each side. 


4. Removed the pork from the pan and let it sit a room temp. 
5. Put the remaining sesame oil into the pain and add the onion, garlic and red chilies. Stir fry quickly for about 30 seconds. Add the lemon juice, soy sauce and chicken broth and stir to combine. 


6. Place the pork on top of the onions. Cover and turn the heat to simmer. Simmer for about 2 -3 hours or until you can separate the meat with a fork. Taste and add, salt or pepper to adjust.


7. Remove the pork from the pot. Cut off any remaining fat or skin. Slice up the meat and serve on a bed of gravy and onions. 


This recipe turned out a lot better than I could have hoped for. The beauty lies in its simplicity. The few ingredients make it quick to prep and also allows the pork to really shine through. Hope you enjoy it as much as I did!